【Unity】エディタ拡張でノードベースのエディタを作る
はじめに
これはCyberAgent 19新卒 エンジニア Advent Calendar 2018の4日目の記事です。
CyberAgent 19新卒 エンジニア Advent Calendar 2018の中でも、 数少ない(であろう)Unityについてのエントリーです。
エディタ拡張はいいぞ、という話を。

こんな感じのを作ります。
エディタ拡張でウィンドウを作る
Editorフォルダ以下に配置するのと、
using UnityEditor; にEditorWindowを継承するのをお忘れなく。
[MenuItem("Window/Node Editor")]
static void Open()
{
    var nodeEditorWindow = CreateInstance<NodeEditor>();
    nodes.Clear();
    rects.Clear();
    makeTransitionMode = false;
    selectIndex = -1;
    nodeEditorWindow.Show();
}
これだけで画面上部のメニューバーにNode Editorウィンドウを表示するメニューが表示されます。

カスタムウィンドウ第一歩!簡単!
ノードを作る
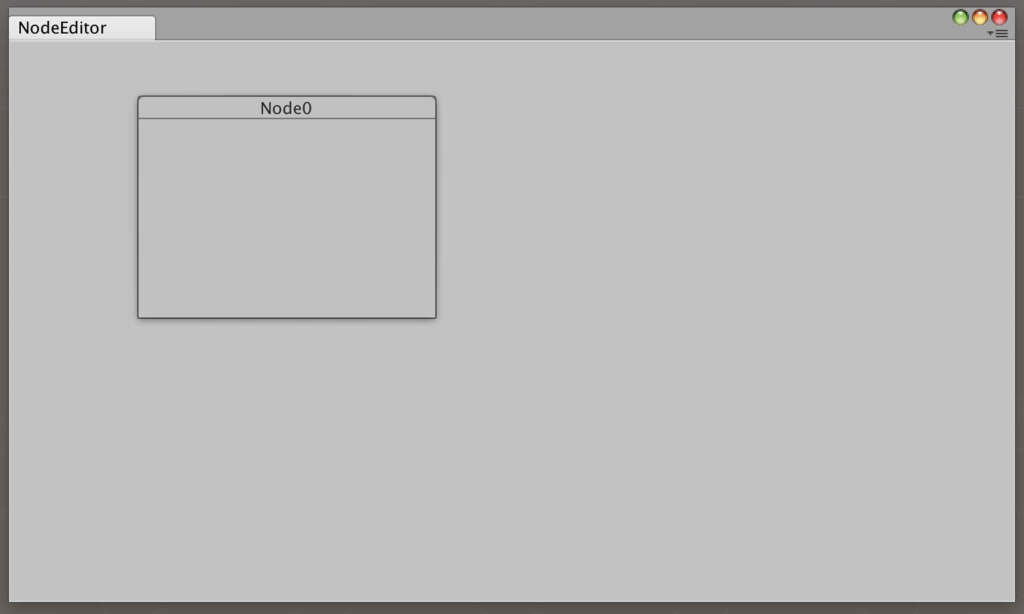
ノードと言っても、あくまでノードっぽいウィンドウです。
恐らくなんらかのHoge型のデータ(structとかclassとか)とノードが紐づくことになると思うので、事前に辞書を作っておきます。
また、後々便利なのでHoge型のデータのリストも作っておきます。
データの中にRectを宣言するのもあり、というかその方が綺麗かもしれませんが、データとエディタ拡張を分離したかったので別で辞書を用意しました。
配置は最低限重ならないように横に伸ばしているだけなので、よしなに。
static private Dictionary<Hoge, Rect> rects = new Dictionary<Hoge, Rect>();
static private List<Hoge> nodes = new List<Hoge>();

void OnGUI()
{
    CreateNode(hoge); // なんかしらの方法でhogeを取得しておく

    BeginWindows();
    for (int i = 0; i < nodes.Count; i++)
    {
        var node = nodes[i];
        rects[node] = GUI.Window(i, rects[node], DrawNodeWindow, "Node" + i.ToString());
    }
    EndWindows();
}

private void CreateNode(Hoge node)
{
    if (!nodes.Contains(node))
    {
        nodes.Add(node);
        rects.Add(node, new Rect(nodes.Count * 250 - 190, 10, 200, 150));
    }
}

private void DrawNodeWindow(int id)
{
    GUI.DragWindow();
}
GUI.DragWindow();でノードをドラッグで動かせるようにしています。
Rectの生成と描画を完全に分けているのは、Rectの生成をOnGUI()の度に繰り返してドラッグできない……!(ドラッグしても元の位置に新たなRectが作られる)という沼にはまったからです。 分けなくてもそこの対処をしていれば問題なく動きます。多分。

それっぽくなってきましたね!
ノード間に線を引く
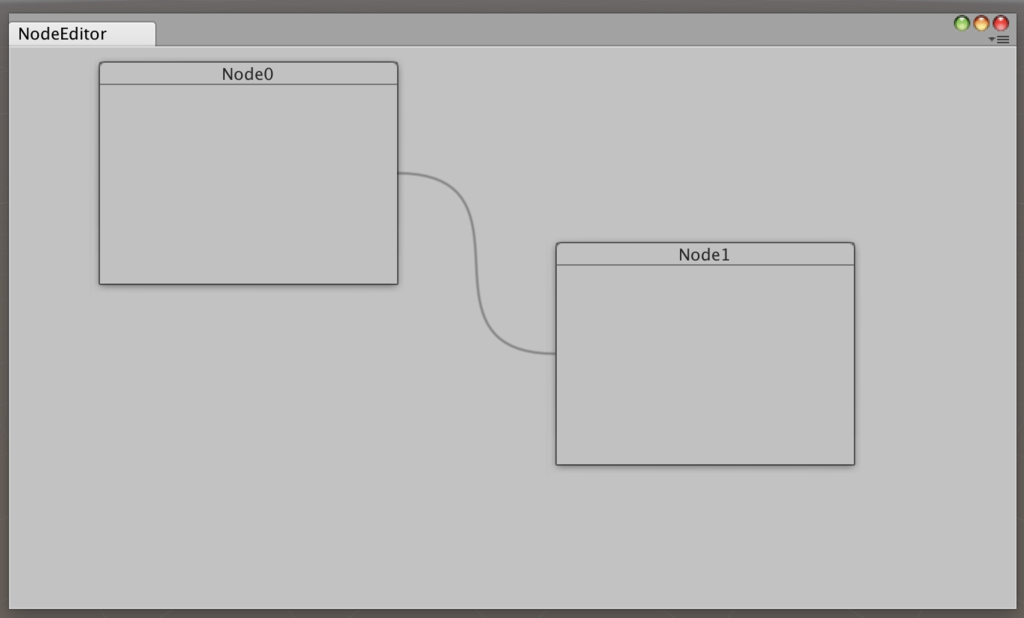
ノードとノードの間に線を引きます。
void OnGUI()
{
    CreateNode(hoge1);  // なんかしらの方法でhoge1を取得しておく
    CreateNode(hoge2); // なんかしらの方法でhoge2を取得しておく
    DrawLine(rects[hoge1], rects[hoge2]);

    BeginWindows();
    for (int i = 0; i < nodes.Count; i++)
    {
        var node = nodes[i];
        rects[node] = GUI.Window(i, rects[node], DrawNodeWindow, "Node" + i.ToString());
    }
    EndWindows();
}

private void DrawLine(Rect prev, Rect next)
{
    var start = new Vector3(prev.x + prev.width, prev.y + prev.height / 2f, 0f);
    var startTan = start + new Vector3(100f, 0f, 0f);

    var end = new Vector3(next.x, next.y + next.height / 2f, 0f);
    var endTan = end + new Vector3(-100f, 0f, 0f);

    Handles.DrawBezier(start, end, startTan, endTan, Color.gray, null, 3f);
}

これで大方完成!
エディタと名乗ったからには、ノードを繋いだり、消したり作ったりできるようにしましょう。
ノードを繋ぐ
ここから泥臭くなってきます。
ノードを左クリックで線を引けるようにします。
恐らく実用的に変更すると、Hoge.nextとかHoge型に繋がる先のノード(Hoge型)を保存しておくことになると思うので、
そのデータを元にDrawLine()を呼び出すように変更してあげてください。
ここでは、実際にノード同士を繋ぐ線を引く処理は省略させてもらいます。
static private bool makeTransitionMode = false;
static private int selectIndex = -1;

void OnGUI()
{
    CreateNode(hoge1);  // なんかしらの方法でhoge1を取得しておく
    CreateNode(hoge2); // なんかしらの方法でhoge2を取得しておく
    DrawLine(rects[hoge1], rects[hoge2]);

    Event e = Event.current;
    ButtonAction(e);

    if (makeTransitionMode)
    {
        Rect mouseRect = new Rect(e.mousePosition.x, e.mousePosition.y, 10, 10);
        DrawLine(rects[nodes[selectIndex]], mouseRect);
        Repaint();
    }

    BeginWindows();
    for (int i = 0; i < nodes.Count; i++)
    {
        var node = nodes[i];
        rects[node] = GUI.Window(i, rects[node], DrawNodeWindow, "Node" + i.ToString());
    }
    EndWindows();
}

private void ButtonAction(Event e)
{
    if (e.button == 1 && !makeTransitionMode)
    {
        if (e.type == EventType.MouseDown)
        {
            if (CheckOnWindow(e.mousePosition))
            {
                GenericMenu menu = new GenericMenu();
                menu.AddItem(new GUIContent("Make Transition"), false, ContextCallBack, "makeTransition");
                menu.ShowAsContext();
                e.Use();
            }
        }
    }
    else if (e.button == 0 && makeTransitionMode)
    {
        if (e.type == EventType.MouseDown)
        {
            int selectedIndex = selectIndex;
            if (CheckOnWindow(e.mousePosition))
            {
                // nodes[selectedIndex]とnodes[selectIndex]間にノードをつなぐ処理
                makeTransitionMode = false;
            }
        }
    }
}

private bool CheckOnWindow(Vector2 mousePos)
{
    bool clickedOnWindow = false;
    for (int i = 0; i < nodes.Count; i++)
    {
        if (rects[nodes[i]].Contains(mousePos))
        {
            selectIndex = i;
            clickedOnWindow = true;
            break;
        }
    }
    return clickedOnWindow
}

private void ContextCallBack(object obj)
{
    string type = obj.ToString();
    if (type == "makeTransition")
    {
        makeTransitionMode = true;
        return;
    }
}
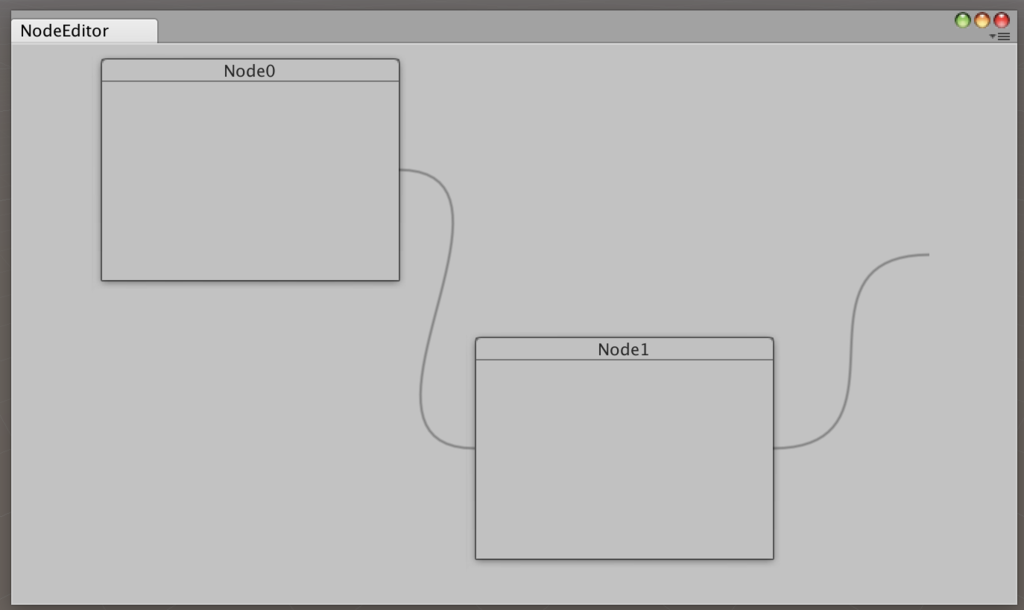
左クリックからMake Transitionを選ぶと線がマウスについてきて、他のノードをクリックすると消えるようになりました。 (前述のように選んだノード同士の線を繋ぐ処理は補完してあげてくださいね)

ノードを繋ぐ線を削除する処理はデータの仕様によって異なる部分も多いと思うので省きます。 繋ぐのと同じようによしなに実装してあげてください。
ノードを削除する
左クリックでノードを削除できるようにします。
そろそろどういうデータ構造で利用するのかきちんとして整備しておいてください。
上の方で書いたOnGUI()のままだとノードを消しても消しても生成し直してしまいます。
private void ButtonAction(Event e)
{
    if (e.button == 1 && !makeTransitionMode)
    {
        if (e.type == EventType.MouseDown)
        {
            if (CheckOnWindow(e.mousePosition))
            {
                GenericMenu menu = new GenericMenu();
                menu.AddItem(new GUIContent("Make Transition"), false, ContextCallBack, "makeTransition");
                menu.AddSeparator("");
                menu.AddItem(new GUIContent("Delete Node"), false, ContextCallBack, "deleteNode");
                menu.ShowAsContext();
                e.Use();
            }
        }
    }
    else if (e.button == 0 && makeTransitionMode)
    {
        if (e.type == EventType.MouseDown)
        {
            int selectedIndex = selectIndex;
            if (CheckOnWindow(e.mousePosition))
            {
                // nodes[selectedIndex]とnodes[selectIndex]間にノードをつなぐ処理
                makeTransitionMode = false;
            }
        }
    }
}

private void ContextCallBack(object obj)
{
    string type = obj.ToString();
    if (type == "makeTransition")
    {
        makeTransitionMode = true;
        return;
    }
    else if(type == "deleteNode")
    {
        Hoge hoge = nodes[selectIndex];
        nodes.Remove(hoge);
        rects.Remove(hoge);
        // hogeのインスタンスを削除
        return;
    }
}
完成に近づいてきました。
ノードを生成する
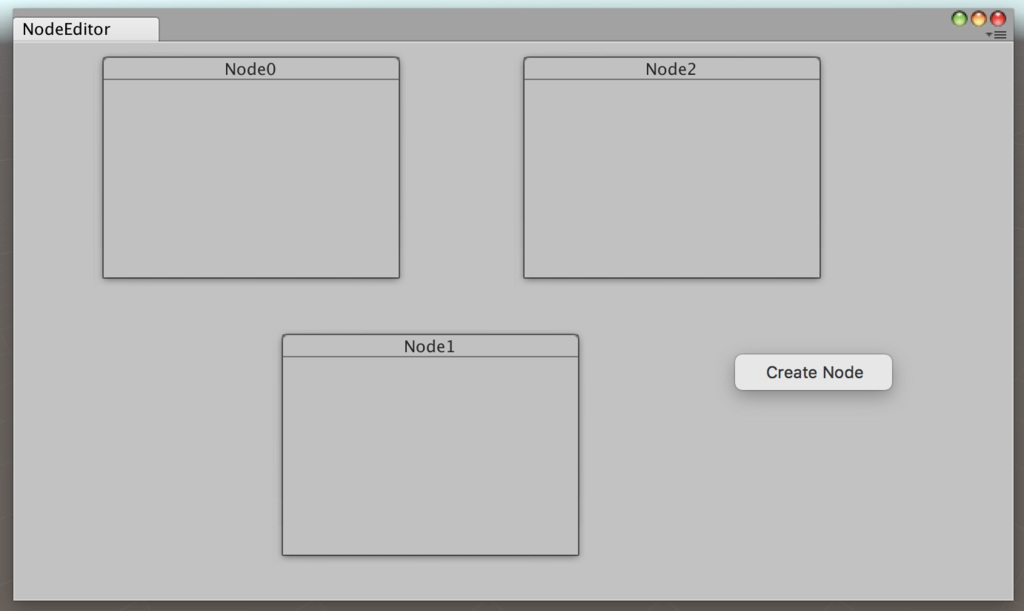
仕上げにノードの生成機能を追加しましょう。
削除の実装が出来たならばもう簡単ですね。
private void ButtonAction(Event e)
{
    if (e.button == 1 && !makeTransitionMode)
    {
        if (e.type == EventType.MouseDown)
        {
            GenericMenu menu = new GenericMenu();
            if (CheckOnWindow(e.mousePosition))
            {
                menu.AddItem(new GUIContent("Make Transition"), false, ContextCallBack, "makeTransition");
                menu.AddSeparator("");
                menu.AddItem(new GUIContent("Delete Node"), false, ContextCallBack, "deleteNode");
            }
            else
            {
                menu.AddItem (new GUIContent ("Create Node"), false, ContextCallBack, "node");
            }
            menu.ShowAsContext();
            e.Use();
        }
    }
    else if (e.button == 0 && makeTransitionMode)
    {
        if (e.type == EventType.MouseDown)
        {
            int selectedIndex = selectIndex;
            if (CheckOnWindow(e.mousePosition))
            {
                // nodes[selectedIndex]とnodes[selectIndex]間にノードをつなぐ処理
                makeTransitionMode = false;
            }
        }
    }
}

private void ContextCallBack(object obj)
{
    string type = obj.ToString();
    if (type == "makeTransition")
    {
        makeTransitionMode = true;
        return;
    }
    else if(type == "deleteNode")
    {
        Hoge hoge = nodes[selectIndex];
        nodes.Remove(hoge);
        rects.Remove(hoge);
        // hogeのインスタンスを削除
        return;
    }
    else if (type == "node")
    {
        // hogeのインスタンスを生成
        CreateNode(hoge);
        return;
    }
}

完成です!
実用的なところまで落とし込むにはデータ構造をきちんと考えないといけませんが、仕組みとしては以上です。
DrawNodeWindow() に処理を書いてあげれば、入力したり変数を表示したり出来ますので、オレオレノードベースエディタを完成させましょう!
最後に
エディタ拡張は良いぞ。 ただし、あくまでもエディタ拡張は開発を便利にする機能なのでとらわれ過ぎないように。 多少の妥協は仕方ない、と思うようにしよう。
エディタ拡張以前のデータ設計が一番重要です!
下記コード全体
参考
Unityフォーラム・Qiitaをかなり参考にさせていただきました。
ネット社会素晴らしい。
[https://forum.unity.com/threads/simple-node-editor.189230/:title]